SCCM – Cloud Management Gateway
The fast channel of the current branch 1610 of System Center Configuration Manager (SCCM) got an interesting update which deliver the Cloud Management Gateway.
This new feature will help to reduce the infrastructure complexity to manage internet based client.
NOTE if the update is not displayed in the Update and Servicing section, you may not have enabled the fast channel. To do this, download the script available here
Install and Enable Cloud Management Gateway feature
From the console, access the Update and Servicing section to download and install the update
When installing the update, ensure you enable the Cloud Management Gateway feature
Create the Cloud Management Gateway
Before starting you will need to request a new certificate to include the namespace.
Then from the SCCM console, go to the AdministrationCloud ServicesCloud Management Gateway to create the new gateway.
The process is pretty straight forward
Provide the Subscription ID and the management certificate (the new one with in a .CER and .PFX format) – the CER file will be uploaded into the Azure subscription while the PFX will be imported into SCCM with the wizard.
NOTE if you do not upload the certificate into Azure, you will get an error “The server failed to authenticate the request. Verify that the certificate is valid and is associated with this subscription”
You can get the Subscription ID from the Azure portal
To define the VM creation details you need to import again the certificate (PFX file); you may got a pop up being displayed “The service certificate has the following errors/warnings.”, do not be afraid this is because you generates your certificate with the SCCM server name, you will be able to select the service FQDN after the import which will generates the service name correctly
Select the correct FQDN to generate the service name as well as the Region where the VM will be provisioned
You can uncheck the Verify client certificate revocation, unless your internal CA is publicly published
The next settings define the alert thresholds; keep it as default or change it to match your need
After the usual configuration summary you can complete the creation process; you will to wait some time to get the VM provisioned on your Azure tenant; you can check the progress from the SCCM console
Configure the Cloud Management Gateway
Once the Cloud Management Gateway status is provisioning completed in the SCCM console, you can continue to configure the gateway
To do so, you need to define a connection point with the Cloud Management Gateway by adding the new server role “Cloud management gateway connection point”
Once you have enabled the cloud management gateway connection point role, you need to update your management point to take advantage of the new role
At this stage, the status of the Cloud Management Gateway is now Ready and you can see the connection point(s) using the Connection Point tab (the status is Disconnected if you do not have yet enabled the management point)
Once the connection point status is Ready, you can also see the role endpoints associated with the gateway
Check the client
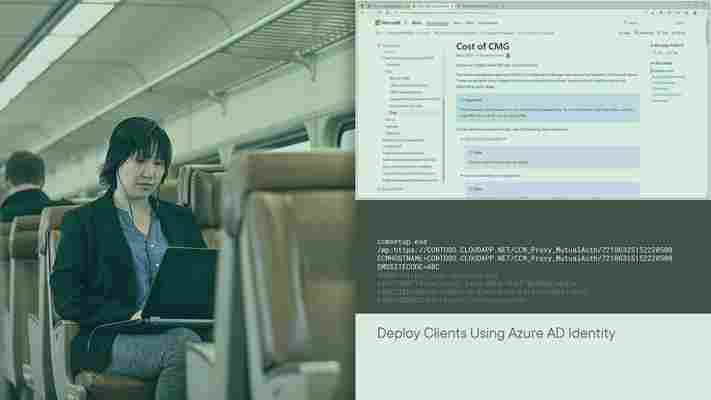
Once you have configured the gateway, you should see your Internet based client using the new Internet-based management point which will be something like The cloud management gateway (CMG) gives us an easy way to manage our Configuration Manager clients over the internet. CMG is deployed as an Azure cloud service with many resources including virtual machines and storage accounts. Once the CMG is created, you can manage your roaming clients without any additional hardware over the WAN. You also don’t need to expose your on-premises infrastructure to the internet like traditional internet based client management (IBCM) services that were used in the past. Some of the major benefits of using CMG is patch management, deploying applications to devices, and even remote control of remote clients. Here is a basic architecture overview of the CMG provided by Microsoft. Copyright Microsoft In this article, we will be setting up CMG using a virtual machine scale set since classic service is not available for a Cloud Service Provider (CSP) subscription. As of this post, CMG with VM scale set is still a pre-release feature in Configuration Manager so we need to enable this feature first. Navigate to Administration>Overview>Updates and Servicing>Features. Look for the feature named: Cloud management gateway with Azure VM scale set and turn it on. If you are unable to turn on the feature, you can follow my other post here: How To Enable Features in SCCM There are some other prerequisites specific to my setup before I could actually create the CMG that I will outline below. These are just some things that I wish I knew before I actually started creating the service so I hope it will help you with your adventure too. You need to verify both the cloud service name and storage account name will be available in all of Azure or else the deployment will fail. Your service will be given a DNS name as a subdomain of For example, For virtual machine scale set, the DNS name is altered and now includes the region of the subscription as well. For example, In Azure, go to cloud services (classic) and begin to create a new service just to verify the unique DNS name you choose is available. Second, go to storage accounts and begin to create a new storage account to verify that same unique name will be available in Azure. Do not finish creating any of the accounts, we just want to make sure the names are available for use. The CMG wizard will create the accounts for you. Another tip is to make sure the resource group you create or place the service in has all lowercase letters and/or numbers only and no hyphens or capital letters in the name or else the deployment will fail. The length of the name for the service should be between 3-24 characters. We have to create a web app (server) and a native app (client) within Configuration Manager before creating the CMG. These apps are created for the CMG server to allow secure communication for all of the components that are going to be created in Azure. Once you create the server, you need to grant admin consent under API permissions within App Registrations in Azure. CMG uses a HTTPS service and requires a server authentication certificate to build that secure channel for the client communication over the internet. You can use your own PKI or a public globally trusted certificate authority. Client authentication can happen through PKI certificates, Configuration Manager site tokens or Azure AD. I would recommend enabling hybrid Azure AD for modern authentication. To enable hybrid AD, you can follow my guide here: Enable Azure AD Hybrid Join. Client App and Server App The first thing we need to configure is the client and server app using the Azure Services Wizard. These apps provide subscription details, configuration and authentication communication with your Azure tenant. Navigate to Administration>Overview>Cloud Services>Azure Services and click on Configure Azure Services at the top left. On the Azure Services screen, type in a name for your service and make sure Cloud Management is selected. Click Next. On the App screen, click Browse next to the Web App field and click on Create. On the Create Server Application screen, type in an application name, select the secret key validity period and sign in to your Azure AD tenant. Click OK. Click Browse next to the Native Client App field and create the application the same way. Click OK and Next until completion. Make sure to check Enable Azure Active Directory User Discovery if you are going to use Azure AD as the authentication method for your clients otherwise it is not required to complete the CMG setup. If you click on Azure Active Directory Tenants you should see the new apps you just created. You can verify they were created by also opening the Azure Portal and navigating to Azure Active Directory>App Registrations and click on the All Applications tab. If you use Configuration Manager to create these two app registrations then this next part should be done automatically. For me however, that was not the case. Click on the web (server) app registration you just created. On the server app page, click on API permissions. Expand Microsoft Graph and click on Directory.ReadAll. Switch to Delegated Permissions and expand User. Remove the User.Read permission and click on Update permissions. Click on Grant admin consent and click Yes. For more information on the client and server app including information on how to set them up manually using the Azure portal, click here. Registering Resource Providers Although this isn’t mentioned in the official Microsoft documentation for CMG, it was an issue for my setup. There are four resource providers we need to make sure are Registered before we can successfully create the CMG. The resource providers are Microsoft.Compute, Microsoft.Storage, Microsoft.Network and, Microsoft.KeyVault. For a Cloud services (classic) setup, you would need to make sure Microsoft.ClassicCompute and Microsoft.Storage are registered. Navigate to your subscription page in the Azure Portal and click on Resource Providers in the Settings section. Check each resource provider I mentioned and make sure they are registered. If they are not, you can click on each one and simply change it to a registered state. Configuring DNS CNAME Records Since we are using our own organization’s domain name as the CMG service name, we need to create a DNS CNAME record to map the service name to the CMG deployment name. Find the below example for creating a CNAME record with your hosting provider assuming is the service name. We also need to create a CNAME record in our internal DNS. Connect to the server that is hosting your internal DNS and open DNS manager and create a CNAME (alias) record under your domain as shown below. Certificates Since CMG creates an HTTPS connection for internet based clients to communicate with, we need to create a certificate to upload to the CMG during our setup. Certificates are probably the most complicated part of the CMG process. I’ve found that, like with all other steps in setting up the CMG, referencing different tutorials and videos helped me tremendously in understanding all of the components and requirements that are involved. I will outline the steps I completed for getting the server certificate setup but I will also link other resources that may help you towards the bottom of this section. You have two choices for creating the certificate. You can either use a public and globally trusted certificate provider or you can use your own internal public key infrastructure (PKI). There are two terms we need to be familiar with before creating the certificate. Service name: The common name (CN) of the CMG server authentication certificate. For example – or Deployment name: This is the first part of the service name plus the Azure location for the CMG deployment. For example – Login to your Certification Authority server. Right click on Certificate Templates and click Manage. If you have already created a web server certificate for SCCM you can just duplicate that certificate. If not, you can duplicate the Web Server certificate. In the Compatibility tab, verify the Certification Authority is set to Windows Server 2003 and Certificate Recipient is set to Windows XP / Server 2003. Click on the General tab and type a display name. Click on the Request Handling tab and make sure Allow private key to be exported is checked. Click on the Security tab and click Add to add the group that contains your primary site server. Check the Read and Enroll boxes. You can uncheck the Enroll permission for Enterprise Admins and click Apply and OK to close the Properties of New Template dialog box. Click X to close the Certificate Templates Console as well. Next, we will click right click on Certificate Templates>New>Certificate Template to Issue In the Enable Certificate Templates dialog box, select the new certificate you just created and click OK. Login to your primary site server for SCCM and open the Certificates console Click on the arrow next to Personal, right click on Certificates and select All Tasks>Request New Certificate… On the Before You Begin page, click Next. On the Select Certificate Enrollment Policy, the Active Directory Enrollment Policy should already be selected. Click Next. On the Request Certificates page, click on the link below the SCCM CMG Certificate that says More information is required to enroll this certificate. On the Certificate Properties dialog box, change the type to DNS under the Alternative name: and type in your CMG service name. For example: Click on the General tab and specify a friendly name. Click Apply and OK to close the Certificate Properties. Back on the Certificate Enrollment dialog box, click on Enroll. Once the certificate is successfully enrolled, click on Finish. Now we need to export the certificate so that we can upload it when we create the CMG in SCCM. Right click on the new certificate you created and click on All Tasks, select Export. On the Certificate Export Wizard, click Next. Make sure to check Yes, export the private key and click Next. On the Export File Format page, choose (.PFX) and click Next. Next, since we are setting up CMG using our own PKI, we will need to export the root certificate as well for later use. For more information on certificates, check out the links below: One good place to start is with the official Microsoft documentation that can be found here. The guys at Patch My PC created a wonderful video of how to setup the certificates. You can follow that here. Configuring Cloud Management Gateway Navigate to Administration>Overview>Cloud Services>Cloud Management Gateway and click on Create Cloud Management Gateway. Make sure Virtual machine scale set it selected and click on Sign In to sign in with your Azure Global Administrator credentials. Click Next once your subscription ID, server app and tenant name are populated. On the Settings page, click Browse to select the .pfx certificate you just created. The service name and deployment name should populate. Choose whether you want to use an existing Resource Group or create a new one just for the CMG components. I chose to create a new Resource Group to keep it tidy just in case I needed to delete and recreate the CMG, it’s easier to manage. Click on Certificates to upload the root certificate file. Choose whether to Verify Client Certificate Revocation or not. I have found that this caused more problems for me so I recommend leaving this unchecked if you are not sure. Click here for more information. Finally, check the box to Allow CMG to function as a cloud distribution point and click Next. Click Next on the Alerts page. Click Next on the Summary page. Click Close on the Completion page. The CMG will show Provisioning for about 10-20 minutes. Next, we will add the CMG connection point. Navigate to Administration>Overview>Site Configuration>Servers and Site System Roles. Right click on your primary site server and click Add Site System Roles. Verify everything is correct on the General and Proxy screens and click Next. On the System Role Selection screen, check the box next to Cloud management gateway connection point and click Next. On the Summary page, click Next. On the Completion page, click Close. You can follow the installation progress in SMS_Cloud_ProxyConnector.log. Configure System Roles to Communicate with CMG Navigate to Administration>Overview>Site Configuration>Servers and Site System Roles, click on the primary site server and open the Properties of the Management point. We will leave HTTP selected and tick the box next to Allow Configuration Manager cloud management gateway traffic. This option allows us to take advantage of E-HTTP (Enhanced). For more information on E-HTTP, click here. Click OK. If you have a Software update point, you will do the same thing for that role. Click OK. Configure Client Settings Navigate to Administration>Overview>Client Settings and open the Properties of your client settings. Select the Cloud Services settings and set all drop downs to Yes. Click OK. Verify Next, we will verify that clients can communicate with the CMG. On a client that is connected to intranet, perform a machine policy retrieval and restart the SMS Agent Host service in Services. On the client computer, open the Control Panel and click on Configuration Manager. Click on the Network tab to verify the internet-based management point (FQDN) is populated with your CMG. You can also check the ClientLocation.log for more information. If you want to force clients to work on internet instead of intranet, you can set a registry key. In Registry Editor, set HKLM/Software/Microsoft/CCM/Security/ClientAlwaysOnInternet to 1 and restart the SMS Agent Host. Troubleshooting Here is a list of logs for checking the CMG: CloudMgr.log, ClientLocation.log, CMGHTTPHandler.log, CMGService.log, SMS_Cloud_ProxyConnector.log Further Support As I mentioned earlier, CMG is a huge undertaking and I don’t think reading one single guide is enough to fully grasp all that it entails. Here is a list of useful troubleshooting resources from other blogs that helped me along the way. Awesome post for using the Connector Analyzer tool: What you'll learn Everything you've seen in the learning path thus far has focused on the on-premises use case. These days, though, the endpoint management solution your organization needs is one that can also service internet-based clients. Extending your on-premises MECM infrastructure to manage those clients is the topic for this course. You accomplish it by preparing for and deploying MECM's Cloud Management Gateway into an available Azure subscription. In this fifth course out of sixteen, Microsoft Endpoint Manager: Cloud Management Gateway with MECM, you'll get an introductory look at the Cloud Management Gateway itself. First, you'll get to know the use cases for the CMG, and how and where it fits into the rest of Microsoft Endpoint Manager, including Microsoft Intune. Then, you'll prepare the hierarchy for and then deploy the CMG into an Azure subscription. Once deployed, you'll get a chance to see the user experience for clients who leave your local-area network. Next, you'll explore a few special situations for deploying MECM clients to machines outside your LAN who need to connect to MECM via the CMG. Finally, you'll explore a very different tool for extending not only client access, but also your server infrastructure to your Azure subscription.Setup Cloud Management Gateway
Microsoft Endpoint Manager: Cloud Management Gateway with MECM
Leave a Comment